Mailissa Transfer#
This module allows you to transfer the full mail or parts of it to another system or data storage. With this module you can share a mail with others who also have access to the areas in those external systems and data stores.
Services#
In this area you see all services that are currently available for you. If you are missing a service, please contact your local administrator. He can activate or buy different services.
Mailissa comes with a variety of service enabled by default:
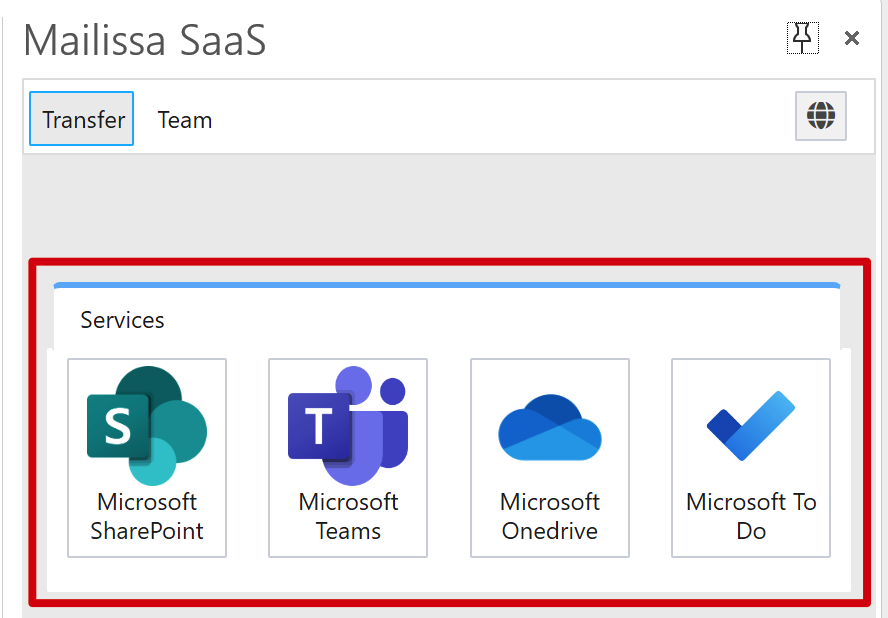
Each service has it's own properties and functions which are easy to explore. Keep in mind that using those services always includes that you are going to share the mail with others, especially when you are using a service such as Teams or SharePoint.
Authentication#
When you use a Mailissa service for the first time, you have to authenticate to it using your credentials.
A window will pop up where you select your identity and then provide your credentials. If this is successful, the window will close automatically and the service details are loaded. It may be that the window automatically disappears without any interaction needed from you. In this case the login process was finished automatically using the single-sign-on functionality.
Reseting your Credentials#
You can reset your credentials for each service by opening the following web page:
You have to login using your Microsoft credentials. After you logged in click on the "Manage Passwords" tab and you see the list of services and the state of your credentials:
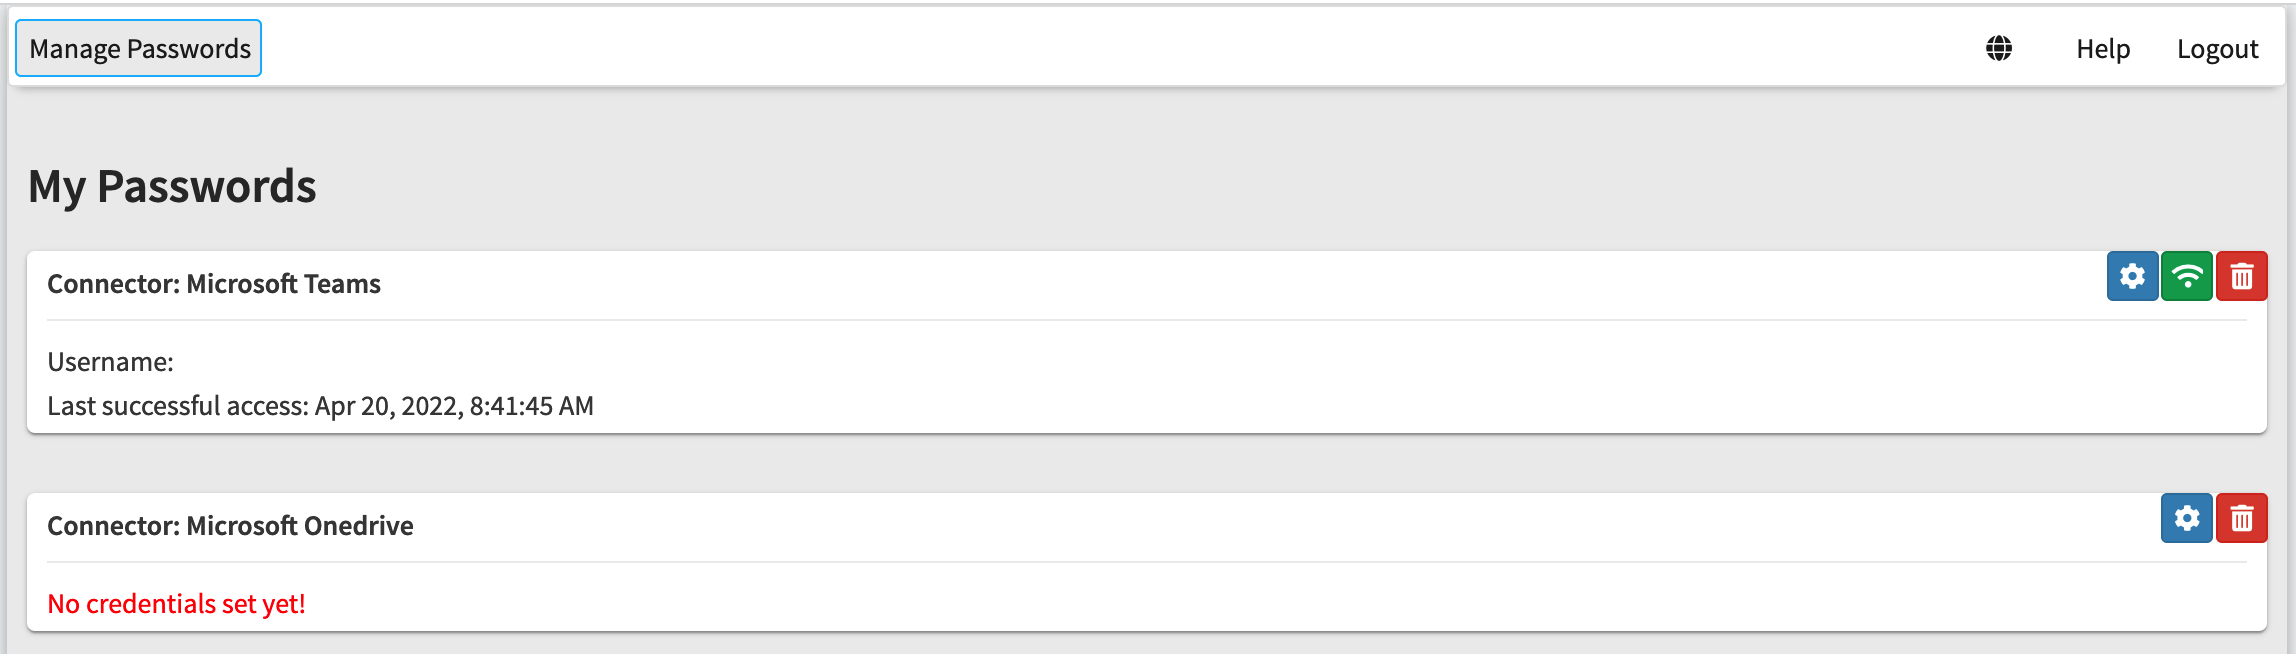
Using the icons you can
- open the credential settings to change your current credentials (only available for services with basic authentication) (blue)
- test the connection to the service (green)
- remove the credentials for the service (red)
History#
Using a service to transfer a mail creates an entry in the Mailissa history. The entry contains all options the user set during the transfer process. Later, a history entry can be used again with another mail. This will speed up the daily work as the user doesn't have to reselect the details.
History entries are created for each mail sender and as global entries.
Notice
Please notice that the history tab only appears after you transferred at least one mail.

History for Mail-Sender#
This list contains entries for the sender of the mail being processed.
Global History#
This list contains all entries ever generated, independent of the mail sender.
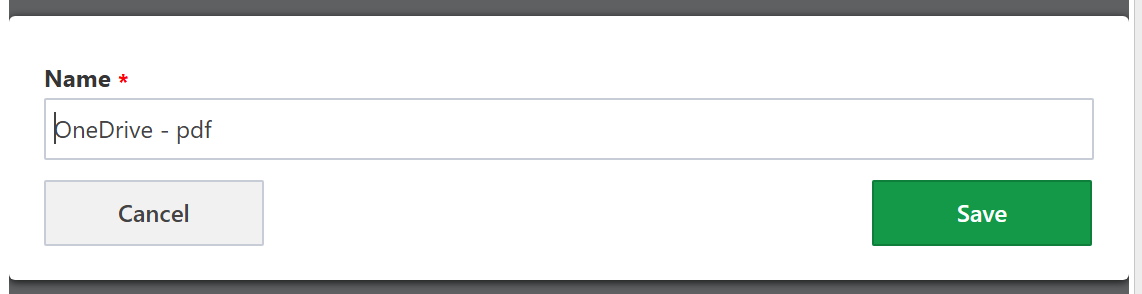
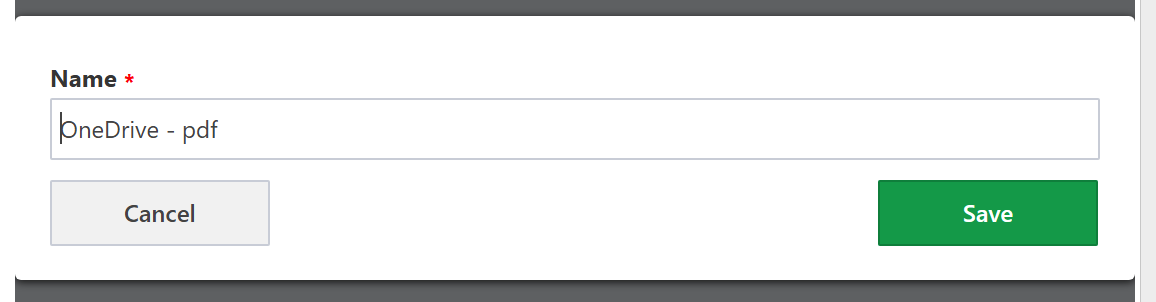
Renaming a history entry#
A service usually stores an entry with a certain name, depending on the service name and the action that was executed. However, you can rename entries for your convenience.
To rename an entry, click on the edit icon right of the section header (History for Mail-Sender or Global history). This switches the list into edit mode. Click on the edit icon next to the entry name to edit the name.

In the dialog, edit the name. Click Save to store the change or Cancel to abort editing.
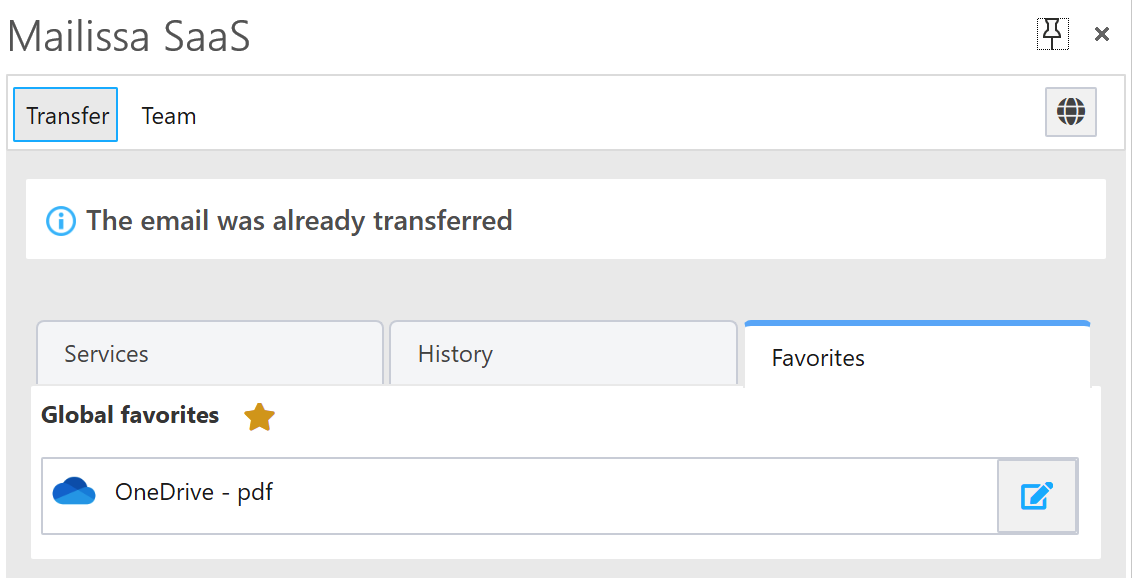
Favorites#
With an increasing number of history entries it may help you to mark a few of them as favorites. This speeds up finding the desired history entry to reprocess the transfer for a particular mail sender or mail in general.
To add an entry to your favorites, simply click on the star icon next to the entry.
Notice
Please notice that the favorites tab is only visible if you have at least one favorite entry defined.

Edit Favorites#
You can also edit the name of a favorite history entry. First click on the edit icon next to the section header (History for Mail-Sender or Global history). This switches the list into edit mode. Click on the edit icon next to the entry name to edit the name.
In the dialog, edit the name. Click Save to store the change or Cancel to abort editing.